
Put a preview of each digital scrapbook kit as the file image on your computer - makes it easy to see a general idea of what is in the kit without opening the file. Mac instructions.

How do you organize your digital scrapbooking stuff? I don't mean the pages you've done - but the elements and papers. I must have too many - I guess. I never seem to remember what each kit looks like and even with this organization I find myself opening almost every kit trying to see if it is the perfect kit for whatever layout I'm working on.

Just recently I remembered how to do this really cool thing that has helped me a lot. You know how each file has a little picture of a file? Did you know you can change that picture?

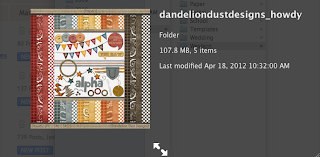
You can even change the file picture to a little picture of the kit inside the folder!

See? Now I can just look at the preview (yes, it's tiny - but it gives me a general idea of what is in the kit) and I don't have to open every single kit to find something perfect to work with.
Here's how to do this - at least, on a Mac. I don't know how to do PC stuff much - but I imagine you could do something similar on a PC.

First find the picture you want to use. I usually use the preview of the kit. If there isn't one or if the kit you're using has a really cool element that shows several of the colors you can use that. Open a jpg image in Preview.

Now you want to select the whole image. I usually do Command + a (or Apple + a) - I usually use key strokes. I think they are so much easier. Then do Command + c to copy. To do this manually I think you can select the entire image under Select and then you can do Edit and Copy.
Then click once on the folder you want to change. Then you need to pull up the information window. You can do that by using key commands Command (Apple) + i or right click on the folder and select 'get info.'
You'll see this at the top of the window that comes up. Click on the little folder image. This one will be at the top of the page - not the bottom.

Once you have selected the folder image do Command + v or paste. This will put your image where the folder image used to be. You should see it change almost immediately at the bottom of this window as well as in your finder window.

When you have all your folders done in one file it will look like this:

To see a quick preview you can just click once on a folder and then hit the space bar. Once the preview is up you can use the arrow keys to get a preview of other folders too.
Now you can quickly see what colors are in each folder.
It's also really helpful in Bridge. This program comes with Photoshop and I love, love, love Bridge - but we'll get into that some other time.